POWER CONSUMPTION ADJUSTMENT INSTRUCTIONS
1. Enable/Disable Component
1.1. Optional Component
Optional components enabled on Infinity-2m: Analog Power, ETH and USB.
1.2. Analog Power
According to different application scenarios, the power of the unused simulation circuit can be turned off to achieve the energy-saving goal.
-
Switchable items
Adjustable items:
Audio/EMAC/HDMI ATOP/IDAC ATOP/IDAC LPLL/DISP LPLL/MIPI DPHY TX TOP/SATA ATOP/UPLL 0,1/USB20 P1,P2,P3
The corresponding kernel config is as follows, you need to close it and set it to y.
# CONFIG_ANALOG_PD_AUDIO is not set

# CONFIG_ANALOG_PD_EMAC is not set

CONFIG_ANALOG_PD_HDMI_ATOP=y

CONFIG_ANALOG_PD_IDAC_ATOP=y

CONFIG_ANALOG_PD_IDAC_LPLL=y

# CONFIG_ANALOG_PD_DISP_LPLL is not set

# CONFIG_ANALOG_PD_MIPI_DPHY_TX_TOP is not set

CONFIG_ANALOG_PD_SATA_ATOP=y

# CONFIG_ANALOG_PD_UPLL_0 is not set

# CONFIG_ANALOG_PD_UPLL_1 is not set

# CONFIG_ANALOG_PD_USB20_P1 is not set

# CONFIG_ANALOG_PD_USB20_P2 is not set

# CONFIG_ANALOG_PD_USB20_P3 is not set

Note: If it is a MIPI panel, MIPI_DPHY cannot be selected.
1.3. ETH
Make adjustments to U-Boot and Linux Kernel to completely close the component.
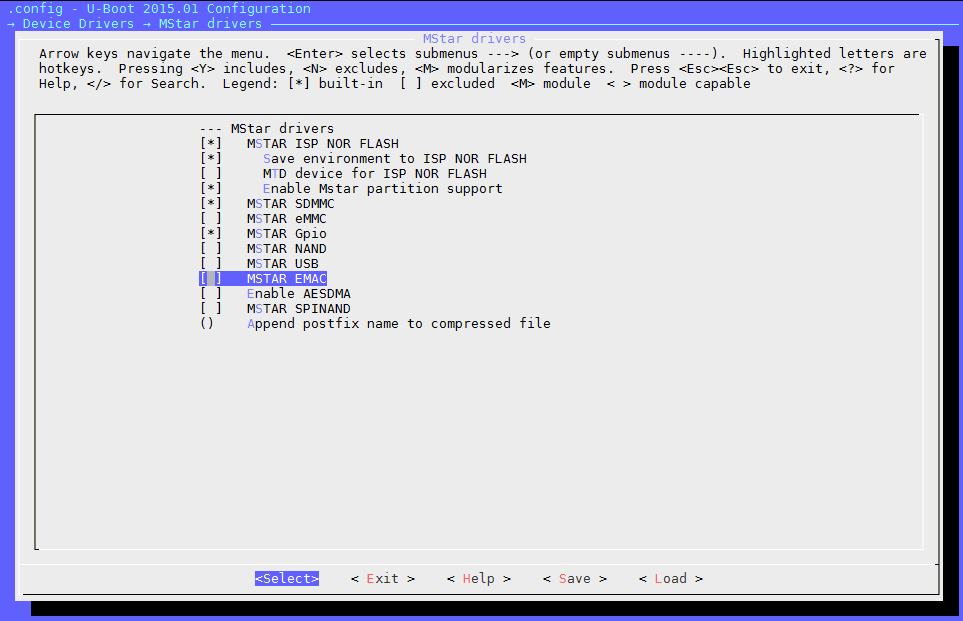
1.3.1. Adjust U-Boot
-
Cancel the option of MSTAR EMAC
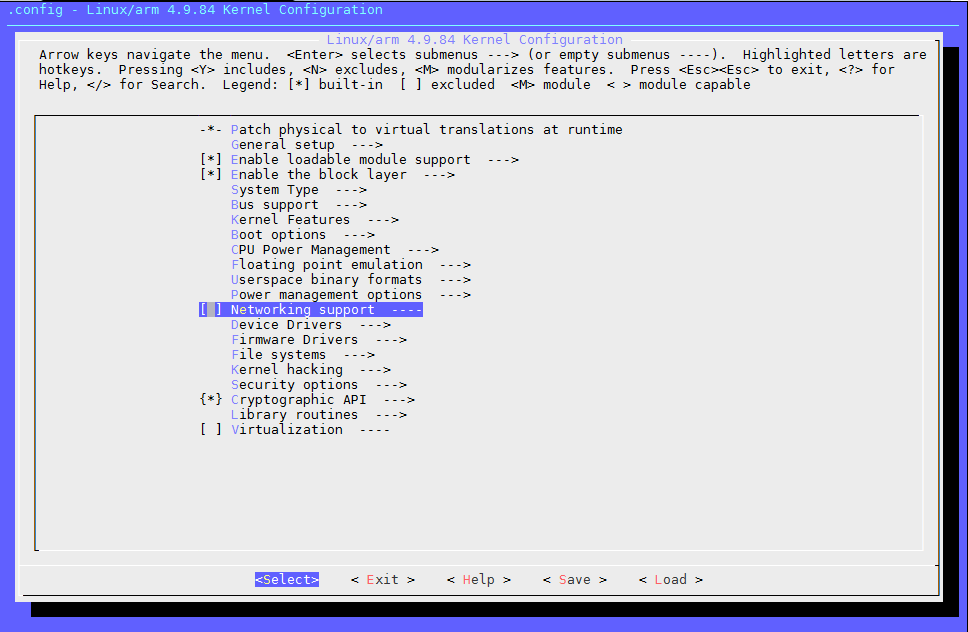
1.3.2. Adjust Linux Kernel
-
Cancel the option of EMAC

-
Cancel the option of networking support
1.4. USB
Make adjustments to U-Boot and Linux Kernel to completely close the component.
1.4.1. Adjust U-Boot
-
Cancel the option of MSTAR USB

1.4.2. Adjust Linux Kernel
-
Modify the file
linux-4.9/arch/arm/boot/dts/infinity2m.dtsi(adjust status ="disable" to turn off the USB)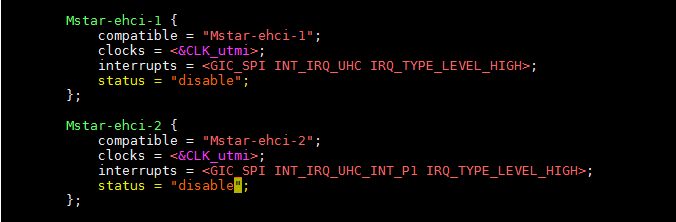
2. Component Clock Frequency Config
2.1. CPU Clock Frequency Config
2.1.1. Voltage Scaling Config
-
Provides the switch of voltage scaling, the default is disabled. Enable it with the following command.
echo 1 > /sys/devices/system/cpu/cpufreq/scaling_voltage -
After it is enabled, the system will automatically switch the voltage according to the current temperature (T). The switching conditions are as follows:
T > 60C : VDD= 0.9V

T < 40C : VDD = 1.0V
2.1.2. Clock Scaling Config
-
The range of clock scaling can be set through the following commands.
echo s_min > /sys/devices/system/cpu/cpufreq/policy0/scaling_min_freq    (default 1GHz)

echo s_max > /sys/devices/system/cpu/cpufreq/policy0/scaling_max_freq    (default 1GHz)
(note: s_min, s_max unit is khz)
-
Setting standards:
-
s_min ≤ s_max
-
s_min ≥ /sys/devices/system/cpu/cpufreq/policy0/cpuinfo_min_freq
-
s_max ≤ /sys/devices/system/cpu/cpufreq/policy0/cpuinfo_max_freq
-
2.2. Encoding Clock Frequency Config
2.2.1. Encoder config Example
After mhal.ko is loaded, before starting the video processing task, you can set the relevant frequency through the following commands:
-
Read the current isp clock rate
cat /sys/venc/ven_clock -
Set venc clock rate
echo 384000000 > /sys/venc/ven_clock
2.2.2. Encoder Clock Frequency Gear
JPE's clock default: 320M
-
216000000
-
288000000
-
320000000
2.2.3. Note
The above settings should be set when the module is loaded in order to take effect correctly.
2.3. Observe CPU Temperature
cat /sys/devices/virtual/mstar/msys/TEMP_R
The result is for reference only, the error is ±5°.